Thursday, 19 January 2012

The Garden


Well my garden has been good to me over the last few months and I have learned a lot from it. First lesson learned is that celeriac really does need to be thinned out quite brutally (I ended up with half a dozen tiny baby celeriac bulbs all grouped together). Second lesson learned was…… rats love tomatoes. I however do not love rats so when I discovered that one had build a nest in the base of one of my beds of tomatoes, I first tried not to scream like a little girl, then I put the hose on “jet” setting and blasted the fat little rodent out of its nest. Once it had ran up over the fence into the neighbour’s yard (oops) I pulled out the tomato plants and filled in its nest. How tough am I???!!!

So I have taken out most of the remaining crop and have some seeds in the seed trays which I’m hoping will develop into healthy seedlings ready to plant in the next 5-6 weeks. I am still nurturing some cherry tomatoes and rhubarb which are maturing in their beds. Watch this space for Rhubarb and apple crumble.

Bread


I have been making a lot more home made bread over the last few weeks and I have to say it's the best I have made, the only difference between this and my previous attempts is that I have finally purchased some decent hard wheat flour and I have made a conscious note of how long I am kneading the dough for. I have found that it really does need to be Kneaded (no pun intended) for 10 minutes.

The reason for using hard wheat flour is that it has a high gluten content that allows the dough to stretch and therefore rise to give you that light fluffy bread everyone loves so much. The kneading of the dough activates the gluten to allow it to stretch and rise to its full capacity so the flour is very important. A lot of plain flours in the supermarket are soft flours which are best for cakes and biscuits.  

Now I don’t really follow a recipe but below is a rough guide of how I make my bread.

Ingredients:

750g flour plus extra for dusting work bench
7g sachet or 1 ½ teaspoons of dry yeast
2 cups of warm water
1 teaspoon of honey
1 tablespoon of olive oil
1 pinch of salt

Method

In a small jug mix the warm water, yeast, sugar, salt, and honey. Give the mixture a stir and leave it aside so the yeast can activate. It is ready to use once there is a thick foamy top to the mixture.

Pour your flour into a very large mixing bowl. Add the yeast mixture and work the flour into a dough.

Knead the dough on a clean work bench for ten minutes, adding flour to the work bench if the dough starts to stick.

Put your kneaded dough into a clean dry bowl and cover it with cling film or a damp tea towel. Leave in a warm area to prove for about 3 hours, or until it has doubled in size.

Now you need to degas the dough by kneading it again lightly. Place your dough on a oiled baking tray then score it and sprinkle with your favourite seeds.  Let the dough sit on top of the preheating oven for about 40 minutes or until it has risen again.

The oven needs to be set at 220°C but when the loaf is put in to bake, turn the oven down to 200°C. Bake the loaf on the bottom shelf for about 30 minutes or until golden. The loaf is cooked when it sounds hollow when tapped. If it doesn’t sound hollow then it needs to be cooked for a little longer.  

Peach and Coconut Crumble


If you have any left over filling from your peach pie (as I did) then make these little crumble to bake at a later time, they freeze well so you can save them for a rainy day.

All you do for these is pour the cooked peaches into ramekins and top with crumble. Use the recipe from the previous post but add coconut. Bake at 180°C until top is golden.

If you didn’t make the peach pie but still want to try these then just follow the instructions on the previous post regarding cooking the peaches or use any stewed fruit you like.

Peach Crumble Pie

It is over half way through January and I haven’t even posted one recipe yet! I have a couple to share with you today one is an all time favourite of mine, peach crumble pie.


The pastry in this recipe is a little fiddly to work with but there are some tricks I will share with you that will make it easier and although it’s a little crumbly when lining your pie dish it is very forgiving and patchwork seems to go unnoticed in the finished product.

For the pastry:
Ingredients:

250g butter
1 cup icing sugar
3 cups flour
3 egg yolks

Method:

Pour all the dry ingredients into a large mixing bowl and mix up by hand.

Cube your butter and add it to the dry ingredients. Start rubbing the butter through the mixture. Once you have rubbed the butter through, add the egg yolks and keep working the mix by hand until it can be worked into a ball.

Now what you need to do is get four sheets of baking paper, take two of the sheets and put half of the pastry mix between the two sheets. You need to try and roll out the mix between the sheets. Try to press from each side and fill the square. Don’t worry if it comes out the side just trim it off and add it to the remaining mix. Depending on the size of your paper sheets you may be able to get three sheets out of this recipe. Repeat this for the rest of your pastry then lay the pastry sheets flat in the fridge for 15 minutes before lining your baking dish.

When you line the pie dish you will take one side of the baking paper off, allow the pastry to get just pliable then press it, exposed side down, into the pie dish. It will probable have a few cracks and it might not fit all the way up the side of your pie dish but don’t worry, just trim off the excess and use it to fill in the gaps. Once you have a line pie dish with no gaps, return it to the freezer for 20 minutes and preheat your oven to 200°C.

The pastry has to be blind baked so cover the frozen pastry lined pie dish with several layers of foil making sure they are well pressed into the base of the dish. Bake the pastry for 25 minutes at 200°C. remove it from the oven and check it has slightly browned all over.

For the crumble:
Ingredients:

1 ½ cups oats
1 ½ cups flour
1 ½ cups almond meal
2 cups of brown sugar
200g butter

Method:
Pour all the dry ingredients into a large mixing bowl and mix up by hand. The mixture is beautiful and sandy at this point.

Cube your butter and add it to the dry ingredients. Start rubbing the butter through the mixture until you get the consistency of wet sand that will hold together when pressed but break apart easily.

For the peach filling:
The great thing about this kind of recipe is you really can use any fruit you have but stone fruit is my favourite, I actually used a mixture of peaches and nectarines and it was delicious.

Ingredients:
8 large peaches (double that if the fruit is small)
½ cup sugar
1 tablespoon of water

Method:
Remove the stone from the fruit and roughly shop it. Pop all the fruit into a large saucepan then add the sugar and water.

Cover the saucepan and cook it on a medium heat until everything starts bubbling quite vigorously. At this point there is usually a large amount of liquid that has come out of the fruit so remove the lid and turn the heat down to low. Allow the fruit to simmer, stirring occasionally, until you have a thick fruit mixture that is not too wet.

To construct the pie, simply pour the peach mixture into the blind baked pie crust. Then top with crumble and return to the oven. Bake on the bottom shelf at 180°C until the top is golden brown.

Wednesday, 14 December 2011

Cream Puffs with Chocolate Sauce

This was homework for my stepdaughters french class. I've never made choux pastry before so I was glad when they worked out so well. I just love when the children are given cooking related assignments!

Friday, 9 December 2011

My Garden

Well this shabby start to summer had to have a silver lining and here it is...... My garden has responded well to all the rain and the result is more spinach than I know what to do with. That's not strictly true, as I am rarely at a loss with what to do with spinach.

Thursday, 8 December 2011

Christmas Cupcakes

I thought I'd bring a little festivity to my Friday morning tea at the office. I've barely posted anything of late but I assure you this is not due to lack of interest! I, like all of you I'm sure, have been completely run off my feet of late and so it looks like January will bring an inundation of recipes to my blog that have otherwise been put on the back-burner.

Thursday, 1 December 2011

Christmas Pudding

Can you believe it's the 1st of December!!!??? well luckily for all of you I am a food obsessed crazy lady who has been soaking fruit for Christmas puddings for months. so please take advantage and use this recipe this Christmas to make your own Christmas pudding because there is just nothing quite like a home made Christmas pudding.

Oh but here's one little tip from the drunken chef, there really is no need to cover the fruit in alcohol when soaking it, you just need to add a cup or two of brandy and or cherry and agitate your jar or container every day or so. I originally used a 700ml bottle to soak 1kg of fruit and although I thoroughly drained the fruit before using it, it was so strong with alcohol I fear you could have been arrested for drink driving after eating it. whoops.


Ingredients:

3 cups fresh bread crumbs
2 cups milk
2 cups flour
3 heaped teaspoons baking powder
2 cups brown sugar
250g butter
4 eggs
1kg soaked fruit
2 cups slivered almonds
1 teaspoon nutmeg
1 teaspoon cinnamon
1 teaspoon ginger

Method:

soak fresh breadcrumbs in the milk.

cream butter and sugar then add the eggs one at a time. you really need the eggs to be at room temperature for this so you don't end up with a curdled mess.

pour the soaked bread crumbs into the butter, sugar and egg mix and stir it all together. scoop your fruit out of the alcohol and add it to the mixture, add the rest of the dry ingredients and mix it all together until you have a nice silky batter.

pour your pudding mix into two greased pudding tins. put the pudding tins into a large saucepan each and fill the saucepan with water until it reaches 3/4 of the way up the side of the pudding tin. bring the water to the boil and then cook on a medium heat for 3 1/2 hours.

My Beautiful Step Daughters First Perfect Omelette

Well it's been too long between visits but I wanted to share this omelette by beautiful stepdaughter made in the weekend. she did it all her self, just the way I taught her and look how lovely it is! The omelette was made with 2 eggs and lots of tomatoe, cheese and onion.


Wednesday, 16 November 2011

Brownies


I’m developing a few easy recipes for one of my home made Christmas recipes. I am making brownies and oat cookies in a jar, all the dry ingredients will be in the jar and all the recipient has to do is melt some butter and add an egg or two to the ingredients, follow the baking instructions and  enjoy the fruits of their labour….. it’s almost cheatingJ

The first batch of the brownies were excellent, i just think they needed some nuts. I'll keep you posted on the success of these recipes/gifts.

Quiche

I have never been a big fan of quiche, the pastry is never quite to my taste. In a bid to better understand why the bottoms of quiches are so soggy I attempted to make two quiches with different pastry styles. I made one with Maggie Beer’s sour cream pastry and one with a short crust.

Sour Cream Pastry - Spinach and Fetta Quiche.


For the filling of the spinach I used about 1 bunch of silver beat to 250 grams of fetta and 6 eggs.

The sour cream pastry was not blind baked, it was set in the freezer for 30 minutes then the filling was poured in and it was baked at 160°C for about 45 minutes.


The shortcrust quiche was flatter and it’s filling was made up of sautéed radish, asparagus, leek, garlic and carrot. I mixed the sautéed spring vegetables with some parmesan and 10 eggs.

The shortcrust was blind baked for 20 minutes first on 180°C then allowed to cool. I poured in the filling and cooked it t 160°C for about 30-35 minutes.

I much preferred the sour cream pastry, the sides turned into a flaky crispy delight but the base was still to soggy for my liking……… perhaps I just don’t like quiche????

Creme Brulee

I went out to dinner with my handsome boyfriend the other night and I won’t mention the name of the restaurant as I am not a food critic and I really enjoy going there but they must have a new chef because the food was down right cooky. The enjoyable side affect of not enjoying your dinner however is that there is plenty of room for dessert. We were served a crème brulee unlike any other I’d seen in that it was cooked in a bowl instead of a ramekin. We liked it so much that I had to try it at home. This is my attempt at the crème brulee.

Friday, 11 November 2011

Poached Quail Eggs with Spicy Tomatoes and Spinach

I topped this breakfast with some buttery sage and mushrooms..... Very yummy.

Quail eggs are so delicate and this is the first time I have poached them. Their whites are much stringer than chicken egg whites, when cooked the slightly chewy whites perfectly encase the soft sweet yolks. I just love these eggs!

Wednesday, 9 November 2011

Radish Salad

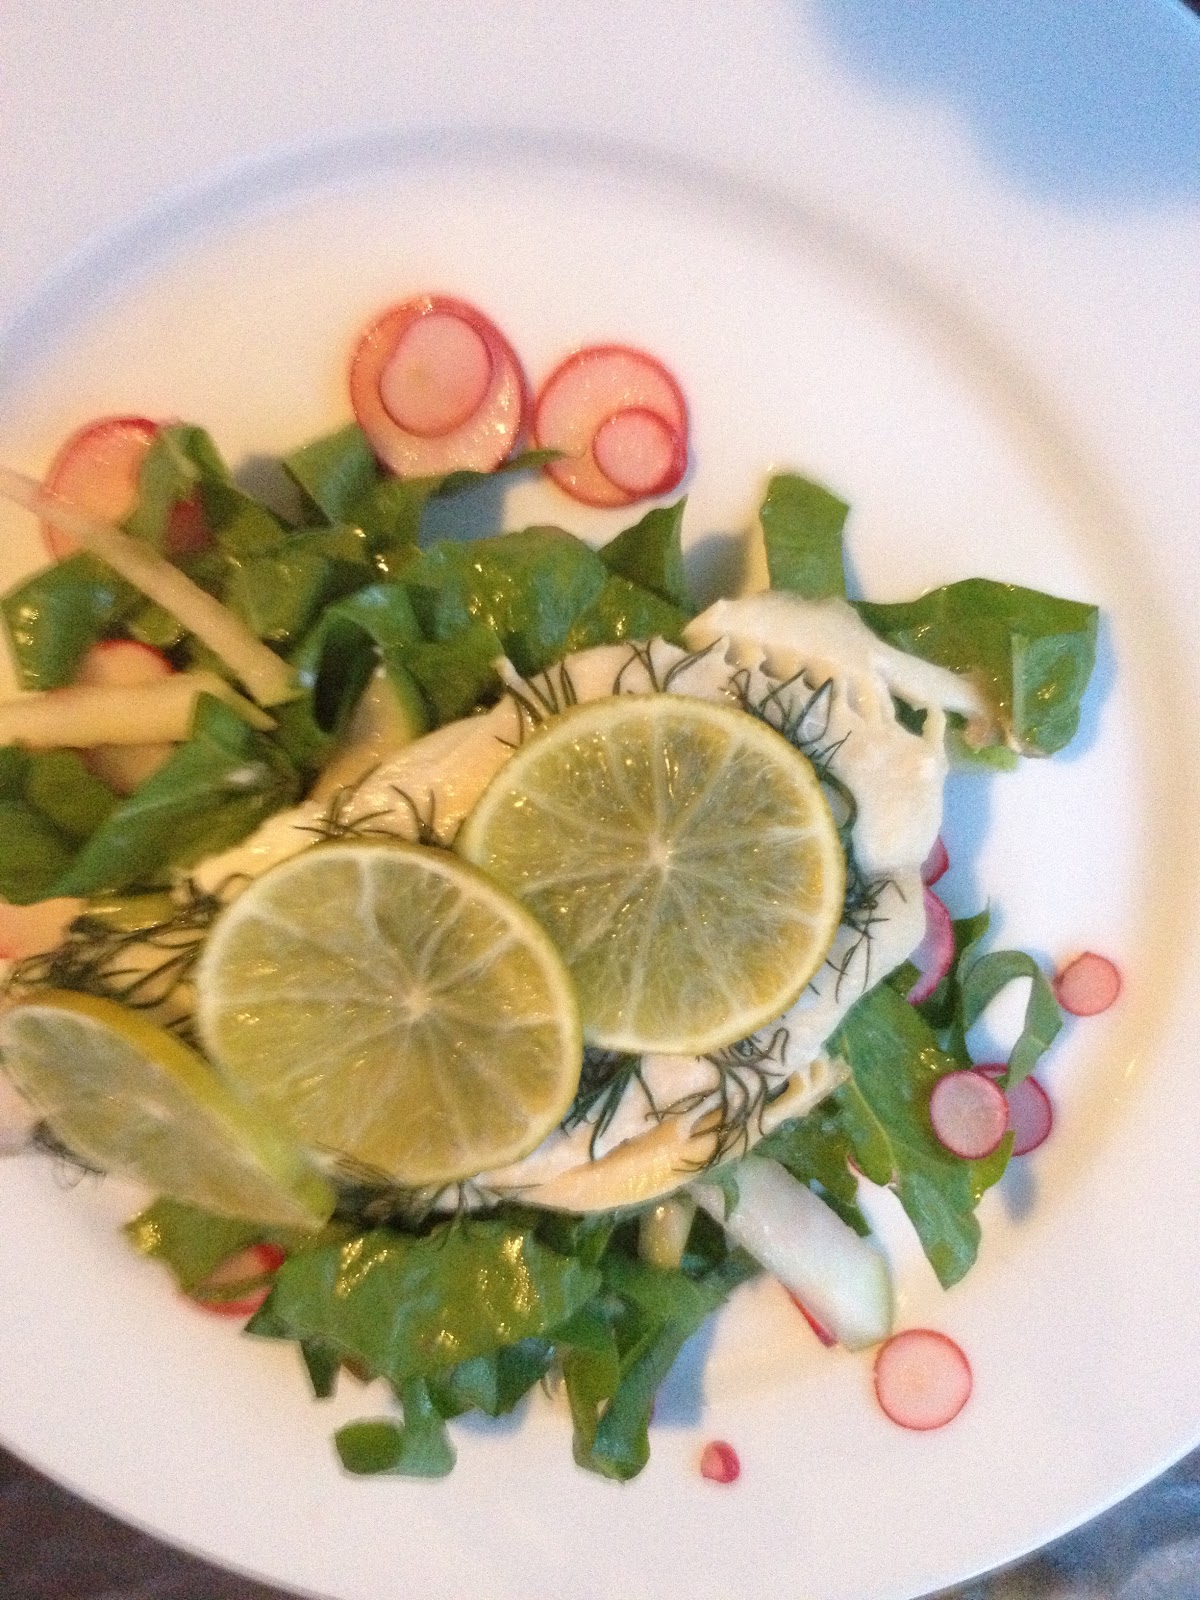
I was watering my garden the other day and saw some wonderful flashes of red beneath the green foliage I was watering. They were my first radishes. It was a hot day and these radishes were just the thing I needed to make a crisp peppery salad to go with dinner which would be alfresco.


The salad I made was quite simple; I used some fresh dark green leaves from the garden with the finely sliced radish and dressed it with olive oil and verjuice. You could serve this salad with anything really but I chose a nice piece of fish with lime and pepper.
Perhaps with a side of asparagus with smoked almonds and butter.........


Pear and Blueberry Loaf

I found some pears looking a little worse for ware in the fruit bowl yesterday so after a horrible afternoon that drove me to my kitchen they were a little gift from heaven. In an effort to hide away from the rest of the world, presumably in a cloud of butter and sugar, I used said pairs to create this lovely pear and blueberry loaf. what a treat......

Ingredients:
3 soft pairs
2 cups frozen blueberries
2 cups plain flour
1 cup almond meal
3 teaspoons of baking powder
100g butter
2 tablespoons of brown sugar
2 tablespoons molasses
2 tablespoons of maple syrup

Method:
Chop and remove the core from the pears then mash them in a large mixing bowl. add the sugar, molasses and maple syrup to the pears then melt the butter and pour it over the mixture and give it a good stir.

Sift in the flour and baking powder over the fruit mixture and stir it in then stir in the almond meal. Pop the frozen berries into the mix and fold them through.

pour the mix into a lined large loaf tin and bake at 150°C for about 40-45 minutes. the loaf needs to spring back when touched in the centre but a skewer needn't come out clean. You can add some nuts to the top as I have done but it will be quite lovely without it.

Saturday, 5 November 2011

Brunch

I love lazy Sundays when breakfast turns into lunch. Today it was poached eggs with fresh tomato and basil.

Thursday, 3 November 2011

Raspberry and White Chocolate cupcakes

Fridays at work have turned into a routine Cake Day. I bake of course. Today after not so subtle hints from my colleagues, it was raspberry and white chocolate cupcakes.

Thai Style Trout with Broccoli Salad


This dish was really light and tasty, the only thing I would have changes was the pasta in the salad. It would have benefited from maybe some soba noodles or udon noodles, anything really that had a hint of an Asian heritage. The Italian pasta spirals stuck out like a sore thumb but they were only added as they were left over from the children’s dinner and I was feeling lazy.   

Ingredients:

Fish:
2 Trout fillets
1 thumb size piece of ginger
1 bulb of spring garlic (save the tops of the garlic for the salad)
1 lime

Salad:
1 small head of broccoli
1 hand full of beetroot leaves (you can use a different dark green salad leaf if you like)
1 cup of cooked soba noodles
The top of a spring garlic bulb

Dressing:
2 tablespoons of soy
1 teaspoon of palm sugar
2 teaspoons of sesame oil
Juice of 2 limes

Method:

Fish:
Place one each piece of fish onto a large square of aluminium foil. Peel and very finely slice the ginger and garlic, sprinkle it over the fish. Slice the lime into about 6 round slices and layer those over the garlic and ginger. Season the fish with cracked pepper then wrap the fish up in a little bundle with the foil making sure there are no wholes in the foil. Pop each parcel into the oven at 180°C for about 10 minutes.

Dressing:
Grate the palm sugar and pop it into a small bowl. Add the lime juice first and stir up the sugar until it dissolves. Once the sugar has dissolved add the rest of the ingredients and mix them all up.

Salad:
Blanch the broccoli then rinse it in cold water. Finely slice the spring garlic top. In a large mixing bowl add the broccoli, beetroot leaves, chopped spring garlic, cooked noodles and dressing. Give it all a mix by hand making sure everything has a nice coat of dressing.

Put a generous mound of salad on the plate and carefully remove the fish from the foil to serve it with the salad. Enjoy!

Spinach Filo

Well what a busy couple of weeks. It’s not that I haven’t cooked but have been unable to post the recipes so this one will be one of several catch up posts I make over today. Last weekend was the Italian Festival at Leichhardt. I routinely run the cooking tent where a chef demonstrates some Italian recipes for the crowd and introduces some local Nonas who also share their recipes. It’s a good day and the crowd are well fed and entertained. This year the chef gave me some fantastic Italian cheeses to go home and experiment with so firstly I would like to share my spinach filo I made. I used the Ricotta Salata cheese, it’s a hard salted ricotta which can be grated.

I had to make spinach filo as my wonderful garden has once again filled with leafy greens. I have English spinach in abundance. I have listed a recipe below but remember mine is all from the garden so exact amounts I’m unsure of, I’ve tried to round it up or down to even bunches you would get at your fruit and veg shop.

Ingredients:

1 packet of filo
2 bunches of English spinach
1 bunch of basil
½ bunch of mint
Zest of one lime
2 cups of grated Ricotta salata cheese
1 egg


Method:

Wash and dry the spinach and herbs then chop them roughly and throw them into a large mixing bowl. Add the grated cheese lime zest and egg and mix by hand until everything is coated in egg.

Use about 5 sheets of filo per roll. You can oil or butter in between each sheet if you like, I find the easiest way to do this is use the spray olive oil and spray each sheet then carefully lay the next sheet on to the oiled one, continuing until you have five sheets. If you are more health conscious you can leave the oil out all together and it will still be a nice filo.

Place half of the mixture onto your pastry length ways; brush the edges with milk to help seal the roll. Fold each side in then roll the filo into a log and place it on a baking tray and cook at 180°C for 25 minutes or until golden brown.

the Ricotta Salata was a lovely point of difference in the filo, i make this recipe often but use feta  or soft ricotta. This cheese kept the filling firm and somehow less oily. I liked it and will source this cheese again.